
Ruby on Rails and RubyMotion Authentication Part Two
A Complete iOS App with a Rails API backend
Welcome back to the second part of the tutorial on how to create a mobile ToDo list app for the iPhone with RubyMotion. In the first part of this tutorial we created the app delegate and the view controllers to allow the users to register and login with the Ruby on Rails backend and made a stub of the task lists view controller.
In this second part we will complete the app with the missing features like displaying the tasks retrieved from the API, allowing the user to create new tasks and let him mark them as completed.
Displaying User’s Tasks
Last time we left the TasksListController with just a blank view and nothing to show besides a title bar. In order to retrieve, create and update the user’s tasks from the backend, we need something that will manage this kind of activities.
To do so we create a simple Ruby model/class called Task and we use some Ruby meta-programming to create some accessors method (getters and setters). It seems complicated but it’s not: for each of the the Task’s properties (id, title and completed flag) we create a getter and a setter through attr_accessor and we override the initialize method to pass an Hash of values to the Task.new call to set them to the correct property.
To learn more about this topic, I suggest to have a look to this tutorial.
# file app/models/Task.rb
class Task
  API_TASKS_ENDPOINT = "http://localhost:3000/api/v1/tasks"

  PROPERTIES = [:id, :title, :completed]

  PROPERTIES.each do |prop|
    attr_accessor prop
  end

  def initialize(hash = {})
    hash.each do |key, value|
      if PROPERTIES.member? key.to_sym
        self.send((key.to_s + "=").to_s, value)
      end
    end
  end

  def self.all(&block)
    BW::HTTP.get("#{API_TASKS_ENDPOINT}.json", { headers: Task.headers }) do |response|
      if response.status_description.nil?
        App.alert(response.error_message)
      else
        if response.ok?
          json = BW::JSON.parse(response.body.to_str)
          tasksData = json[:data][:tasks] || []
          tasks = tasksData.map { |task| Task.new(task) }
          block.call(tasks)
        elsif response.status_code.to_s =~ /40\d/
          App.alert("Not authorized")
        else
          App.alert("Something went wrong")
        end
      end
    end
  end

  def self.headers
    {
      'Content-Type' => 'application/json',
      'Authorization' => "Token token=\"#{App::Persistence['authToken']}\""
    }
  end
end
The Task.all is a similar to an ActiveRecord “find all” method. It will call the API and retrieve the user’s tasks and call the block, passing the tasks to it to do something with them (ie: populating a list).
To put this code in good use, we’ll add some lines to the TasksListController and transform it in a TableView: in the viewDidLoad method a @tasksTableView instance variable is created with UITableView.alloc.initWithFrame.
The delegate and datasource is set to the controller itself, so it is necessary to add some method to it to populate and manage the tableview’s cells: tableView(tableView, numberOfRowsInSection:section) to return the cell’s count and tableView(tableView, cellForRowAtIndexPath:indexPath) to return the cell at the given position.
Don’t forget to add the attr_accessor :tasks at the beginning of the file: it sets up an instance variable to store the tasks as an array.
Finally we add the actual code for the refresh method that is called clicking on the refresh button and at the end of the viewDidLoad method in order to populate the table list with the task retrieved from the API.
# file app/controllers/TasksController.rb
class TasksListController < UIViewController
  attr_accessor :tasks

  def self.controller
    @controller ||= TasksListController.alloc.initWithNibName(nil, bundle:nil)
  end

  def viewDidLoad
    super

    self.tasks = []

    self.title = "Tasks"
    self.view.backgroundColor = UIColor.whiteColor

    logoutButton = UIBarButtonItem.alloc.initWithTitle("Logout",
                                                       style:UIBarButtonItemStylePlain,
                                                       target:self,
                                                       action:'logout')
    self.navigationItem.leftBarButtonItem = logoutButton

    refreshButton = UIBarButtonItem.alloc.initWithBarButtonSystemItem(UIBarButtonSystemItemRefresh,
                                                                      target:self,
                                                                      action:'refresh')
    self.navigationItem.rightBarButtonItems = [refreshButton]

    @tasksTableView = UITableView.alloc.initWithFrame([[0, 0],
                                                      [self.view.bounds.size.width, self.view.bounds.size.height]],
                                                      style:UITableViewStylePlain)
    @tasksTableView.dataSource = self
    @tasksTableView.delegate = self
    @tasksTableView.autoresizingMask = UIViewAutoresizingFlexibleWidth | UIViewAutoresizingFlexibleHeight

    self.view.addSubview(@tasksTableView)

    refresh if App::Persistence['authToken']
  end

  # UITableView delegate methods
  def tableView(tableView, numberOfRowsInSection:section)
    self.tasks.count
  end

  def tableView(tableView, cellForRowAtIndexPath:indexPath)
    @reuseIdentifier ||= "CELL_IDENTIFIER"

    cell = tableView.dequeueReusableCellWithIdentifier(@reuseIdentifier) || begin
      UITableViewCell.alloc.initWithStyle(UITableViewCellStyleDefault, reuseIdentifier:@reuseIdentifier)
    end

    task = self.tasks[indexPath.row]

    cell.textLabel.text = task.title

    cell
  end

  # Controller methods
  def refresh
    SVProgressHUD.showWithStatus("Loading", maskType:SVProgressHUDMaskTypeGradient)
    Task.all do |jsonTasks|
      self.tasks.clear
      self.tasks = jsonTasks
      @tasksTableView.reloadData
      SVProgressHUD.dismiss
    end
  end

  def logout
    UIApplication.sharedApplication.delegate.logout
  end
end
In the refresh method we first clear the controller instance variable tasks and we use the Task.all method to retrieve the user’s tasks and set them to the same variable. We then reload the data inside the @tasksTableView.
The actual cells with the correct task’s title will be set by the tableView(tableView, cellForRowAtIndexPath:indexPath) with the updated tasks list.
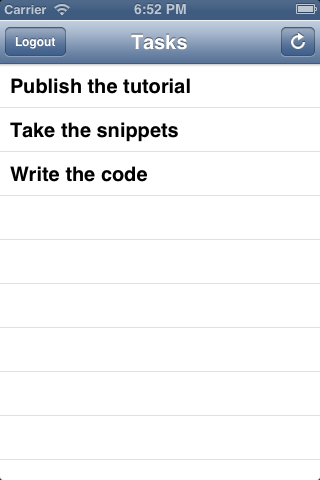
The TasksController populated with the tasks read from the backend
Create a new Task
Unless you want to send curl command in order to create new tasks, we need to add the most important feature of the app: the “new task” view.
First thing first, modify the viewDidLoad method inside the TasksListController adding the “+” button to the right of the navigation bar, besides the refresh button.
# file app/controllers/TasksListController.rb
class TasksListController < UIViewController

  def viewDidLoad
    # Other code

    newTaskButton = UIBarButtonItem.alloc.initWithBarButtonSystemItem(UIBarButtonSystemItemAdd,
                                                                      target:self,
                                                                      action:'addNewTask')
    self.navigationItem.rightBarButtonItems = [refreshButton, newTaskButton]

    # Other code
  end
end
Then add another instance method - addNewTask - at the end of the file that will be called when the user click on the “+” button we just added.
# file app/controllers/TasksListController.rb
class TasksListController < UIViewController
  # Other code

  def addNewTask
    @newTaskController = NewTaskController.alloc.init
    @newTaskNavigationController = UINavigationController.alloc.init
    @newTaskNavigationController.pushViewController(@newTaskController, animated:false)

    self.presentModalViewController(@newTaskNavigationController, animated:true)
  end
end
As you can see, what this method does is similar to the way we launch the WelcomeController in the app delegate: we create a new instance of this new view controller - NewTaskController - we are about to code, we push it in the stack of a UINavigationController and we present the whole thing as a modal, sliding up from the bottom.
The actual NewTaskController is a simple Formotion::FormContoller similar to the login and register one: just a text field and a button to create the new task.
# file app/controllers/NewTaskController.rb
class NewTaskController < Formotion::FormController
  def init
    form = Formotion::Form.new({
      sections: [{
        rows: [{
          title: "Title",
          key: :title,
          placeholder: "Task title",
          type: :string,
          auto_correction: :yes,
          auto_capitalization: :none
        }],
      }, {
        rows: [{
          title: "Save",
          type: :submit,
        }]
      }]
    })
    form.on_submit do
      self.createTask
    end
    super.initWithForm(form)
  end

  def viewDidLoad
    super

    self.title = "New Task"

    cancelButton = UIBarButtonItem.alloc.initWithTitle("Cancel",
                                                       style:UIBarButtonItemStylePlain,
                                                       target:self,
                                                       action:'cancel')
    self.navigationItem.rightBarButtonItem = cancelButton
  end

  def cancel
    self.navigationController.dismissModalViewControllerAnimated(true)
  end
end
Take a look to the bare foundation of this controller: it sets the text field and the button using the init method, it sets the “cancel” button in the navigation bar and defines the method to actually cancel the create action and dismiss the controller.
Before going deeper, we have to go back to the Task model to add a new class method that we’ll use to create new tasks and send them to the backend through the API.
The Task.create method does this thing in a simple way, leveraring on the code we already used in other places like the login action: it sends a POST request to the API endpoint dedicated to the creation of new tasks, with the task’s parameters in the payload. Hopefully, if everything is correct, it sends back the request’s response and calls the provided block.
# file app/models/Task.rb
class Task
  # Other code

  def self.create(params = {}, &block)
    data = BW::JSON.generate(params)

    BW::HTTP.post("#{API_TASKS_ENDPOINT}.json", { headers: Task.headers, payload: data } ) do |response|
      if response.status_description.nil?
        App.alert(response.error_message)
      else
        if response.ok?
          json = BW::JSON.parse(response.body.to_str)
          block.call(json)
        elsif response.status_code.to_s =~ /40\d/
          App.alert("Task creation failed")
        else
          App.alert(response.to_str)
        end
      end
    end
  end
end
To use this new feature in the NewTaskController we need to add a new method called createTask to it:
# file app/controllers/NewTaskController.rb
class NewTaskController < Formotion::FormController
  # Other code

  def createTask
    title = form.render[:title]
    if title.strip == ""
      App.alert("Please enter a title for the task.")
    else
      taskParams = { task: { title: title } }

      SVProgressHUD.showWithStatus("Loading", maskType:SVProgressHUDMaskTypeGradient)
      Task.create(taskParams) do |json|
        App.alert(json['info'])
        self.navigationController.dismissModalViewControllerAnimated(true)
        TasksListController.controller.refresh
        SVProgressHUD.dismiss
      end
    end
  end
end
As you can see, before passing the user’s input to the method, we checks if the submitted title isn’t blank and providing an alert if it is.
If the task’s title isn’t blank, we use the Task.create with a block that provides feedback to the user and dismiss the controller view, asking to the TasksListController to refresh the table view with the newly created task.
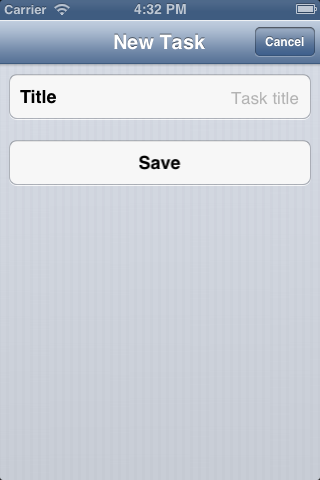
The NewTaskController with the input field
Mark the task as completed
We almost done, we just miss the second most important feature in a ToDo list application: the ability to mark an item as “completed” (and reopening it if it isn’t done yet).
To do so we need to add one more method to the TasksListController tableview delegate and modify the tableView(tableView, cellForRowAtIndexPath:indexPath) method to show a UITableViewCellAccessoryCheckmark (a small “v” checkmark on the right) and change the their title’s font color to a light grey if they are completed.
The last method to add is tableView(tableView, didSelectRowAtIndexPath:indexPath) and as its name suggests, it’s called whenever the user click on a cell in the table, passing the position of the item in the list.
# file app/controllers/TasksListController.rb
class TasksListController < UIViewController
  # Other code

  def tableView(tableView, cellForRowAtIndexPath:indexPath)
    @reuseIdentifier ||= "CELL_IDENTIFIER"

    cell = tableView.dequeueReusableCellWithIdentifier(@reuseIdentifier) || begin
      UITableViewCell.alloc.initWithStyle(UITableViewCellStyleDefault, reuseIdentifier:@reuseIdentifier)
    end

    task = self.tasks[indexPath.row]

    cell.textLabel.text = task.title

    if task.completed
      cell.textLabel.color = '#aaaaaa'.to_color
      cell.accessoryType = UITableViewCellAccessoryCheckmark
    else
      cell.textLabel.color = '#222222'.to_color
      cell.accessoryType = UITableViewCellAccessoryNone
    end

    cell
  end

  def tableView(tableView, didSelectRowAtIndexPath:indexPath)
    tableView.deselectRowAtIndexPath(indexPath, animated:true)
    task = self.tasks[indexPath.row]

    task.toggle_completed do
      refresh
    end
  end
end
What the app does when the task is clicked is simple: first it deselect the cell because we don’t want to leaving it highlighted; then we find the task inside the tasks array and finally we call a new method - toggle_completed - on it, passing it a block where we just refresh the updated list.
The last piece of code we are going to write to complete the application has to be added to the Task model and it’s an instance method this time.
It accepts a block and it just makes an HTTP PUT request to the usual API endpoint, checking if the task is already completed or not and using the correct url then.
The rest of the code should be familiar at this point, it checks for error and calls the block.
# file app/models/Task.rb
class Task
  # Other code

  def toggle_completed(&block)
    url = "#{API_TASKS_ENDPOINT}/#{self.id}/#{self.completed ? 'open' : 'complete'}.json"
    BW::HTTP.put(url, { headers: Task.headers }) do |response|
      if response.status_description.nil?
        App.alert(response.error_message)
      else
        if response.ok?
          json = BW::JSON.parse(response.body.to_str)
          taskData = json[:data][:task]
          task = Task.new(taskData)
          block.call(task)
        elsif response.status_code.to_s =~ /40\d/
          App.alert("Not authorized")
        else
          App.alert("Something went wrong")
        end
      end
    end
  end
end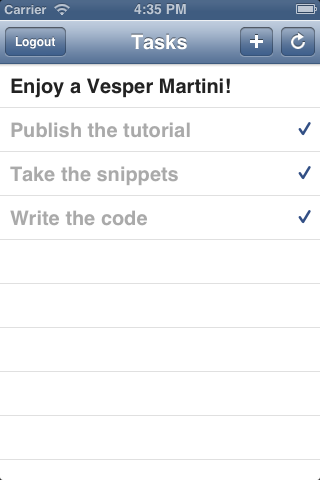
The final TasksListController with some tasks marked as completed
Conclusions
We made it!
As always I hope you could find this tutorial helpful and useful for your projects. If you have any question or request, just drop me a line to luca.tironi@gmail.com.
You can find the complete code of this tutorial and the previous one as well in this repository on GitHub. Check out the other tutorials for the Ruby on Rails backend if you need to.
Bye, Luca
^Back to top